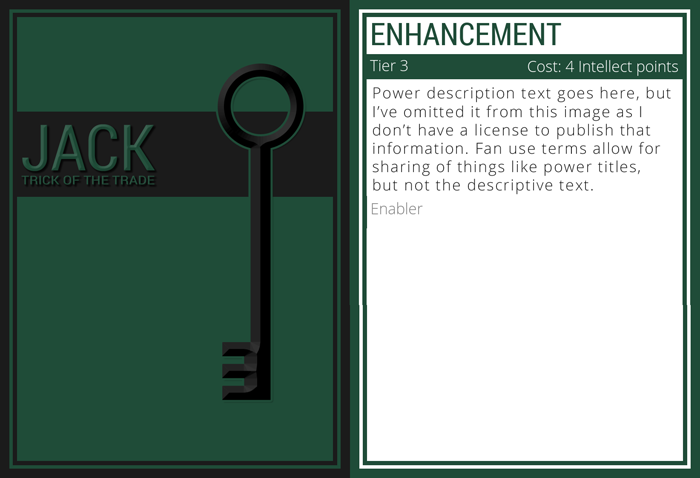
One of the many shortcomings of my technology toolkit is C++. I’ve tinkered with it here and there over the years, but the vast majority of my time and energy has gone into easier languages such as C#, Java, and PHP. I set out to rectify that recently by 1) borrowing a copy of The C++ Programming Language from a generous friend, and 2) diving into a hands-on project well beyond my capabilities. If learning by beating your head against a compiler was a valid way of learning programming, I’d be a Computer Science professor.
The Project
I currently GM two systems: Dungeons & Dragons 5th Edition, and Numenera (a more recent system by former D&D designer Monte Cook). For D&D, Wizards of the Coast had a set of “power cards” produced for every spell in the game. They’re standard playing card size, excellent quality (sturdy and laminated), and big time-savers at the table, especially for newer players or anyone with an inordinate number of spells (hello Wizard!). For most spells it’s no longer necessary to look them up in the rulebook (a few have too much information to fit on a card).
Numenera doesn’t have power cards. Maybe they’ll get around to it at some point (they’ve released card decks for random items and XP). In the meantime, it seemed like a fun project. The basic idea is:
- Copy the powers (Esoteries for the Nano type/class, Tricks of the Trade for Jacks, and Fighting Moves for Glaives) from the source book(s).
- Organize the powers in Excel (separating fields for character type, power tier, title, description, cost and so forth).
- Export to CSV.
- Import the CSV in my C++ program, loop through the entries and output nicely-formatted card images using ImageMagick.
- Print the cards, either on cardstock at home or via a print service / shop.
Step One: Learn C++
This process will continue through every other step and beyond. C++ requires more attention to things like memory management, use of references/pointers, and in general has a less friendly syntax than a language like C#. I have several blocks of code that work for reasons still unknown to me, and several things I tried previously failed to work due to equally mysterious causes.
Step Two: Learn ImageMagick
I spent way more time on this step than I should have. Most of it can be explained by my inexperience with C++ (and with native Windows development), but it seems like there are a few areas where ImageMagick’s actual behavior doesn’t match its documentation. I eventually got it compiled and working with my program (while learning a lot about lib files and DLL loading along the way).
Once I had the library working, drawing elements to an image and saving it was surprisingly easy. Working with text, however, is another story. Among other issues, ImageMagick doesn’t seem to have built-in support for text wrapping. Since I need to write decent-sized chunks of text and I don’t feel like using a monospaced font, I ended up writing what may be the worst text wrapping function of all time.
Step Three: Write the Worst Text-Wrapping Function of All Time
Ok. So there’s no built-in text wrapping. There’s also no built-in way to measure the size of a piece of text. I think there’s a non-ImageMagick way to get the font data that would let me do that, but at this point my head is already full of too much other new information. So I decided to work around the issue using only ImageMagick’s functionality and plain C++. I noticed that when drawing text, you can specify a background color, which will draw a colored rectangle behind the text. You can also sample pixels from anywhere in the image, which turns out to be pretty handy.
Here’s how the text wrap works:
- Set the background color AND the text color to red
- Write the text onto a temp image
- Get a pixel at the right side of the image
- If the pixel is red, the text is too long to fit on the line
- Cut a word from the end of the text and try again
- If it’s stupid but it works, it’s not stupid
I did perform some optimizations, as this turned out to be (predictably) slow with longer strings. In particular, I picked a semi-arbitrary character count that I think is unlikely to ever fit on a single line, and I only write/check that amount of text at a time. If I have 800 characters of text to write, chances are no more than about 50 characters will fit on each line (for the font size and image size I’m using). This reduces the number of failed attempts for each line considerably. Each time I write a line, I get the next ~50 characters, move down to the next line and continue.
The function currently lacks a few features (some more important than others):
- Doesn’t handle overflow off the bottom of the image
- Doesn’t minimize wasted space at ends of lines (e.g. sometimes it might be better to leave a larger gap at the end of one line to use the next few more optimally)
- Only handles left or right alignment; I’d like to have the text justified
Step 4: Tidy Up and Print!
With the basic functionality working, I put some time into cleaning up the output, designing some card backs, and doing general cleanup. I’m almost ready to print the actual cards.
